Time to change your cello strings? Here is a step-by-step guide for how to change your cello strings.
If you are ready to change your strings, it’s best to get some guidance before you attempt it alone. Here is a step-by-step guide with photos to help you get going.
What brand of strings should you select?
For starters, there are basic questions you need answered like, “Where should I purchase my cello strings?” And, “What brand of strings should I purchase?” (Because there are SO many options to chose from!)
If you aren’t currently studying with a cello teacher and you don’t have a local luthier or string shop to guide you with a string selection, check out SharMusic.com. They have a huge selection and a very knowledgeable staff available to assist you.
I play on a spectacular (but ungodly expensive) set of strings. The brand is Thomastik and the strings are called Versum Solo. 
 I love them so much, but music is my livelihood and I have to use the best strings available to me (and ones which sound great on my instrument) therefore I pay the price.
As a nice all-around string set for the beginning to intermediate level cello student, I recommend the Jargar Classic. Nice smooth sound, great projection and gentle on the bank account. I used them through undergraduate music school and they got the job done beautifully.
Steps to changing your strings:
Grab a pencil and a tuner.
Before you get started, find a pencil and open up your tuner of preference (I have the TE tuner app on my phone and it is terrific). Put these two items at arms reach.
Release a fair bit of tension on each of your fine tuners. In other words, make each note VERY, very flat.
Place the cello strings in string order:
Next, place the new strings (still in their respective envelopes) on a chair, or bed… 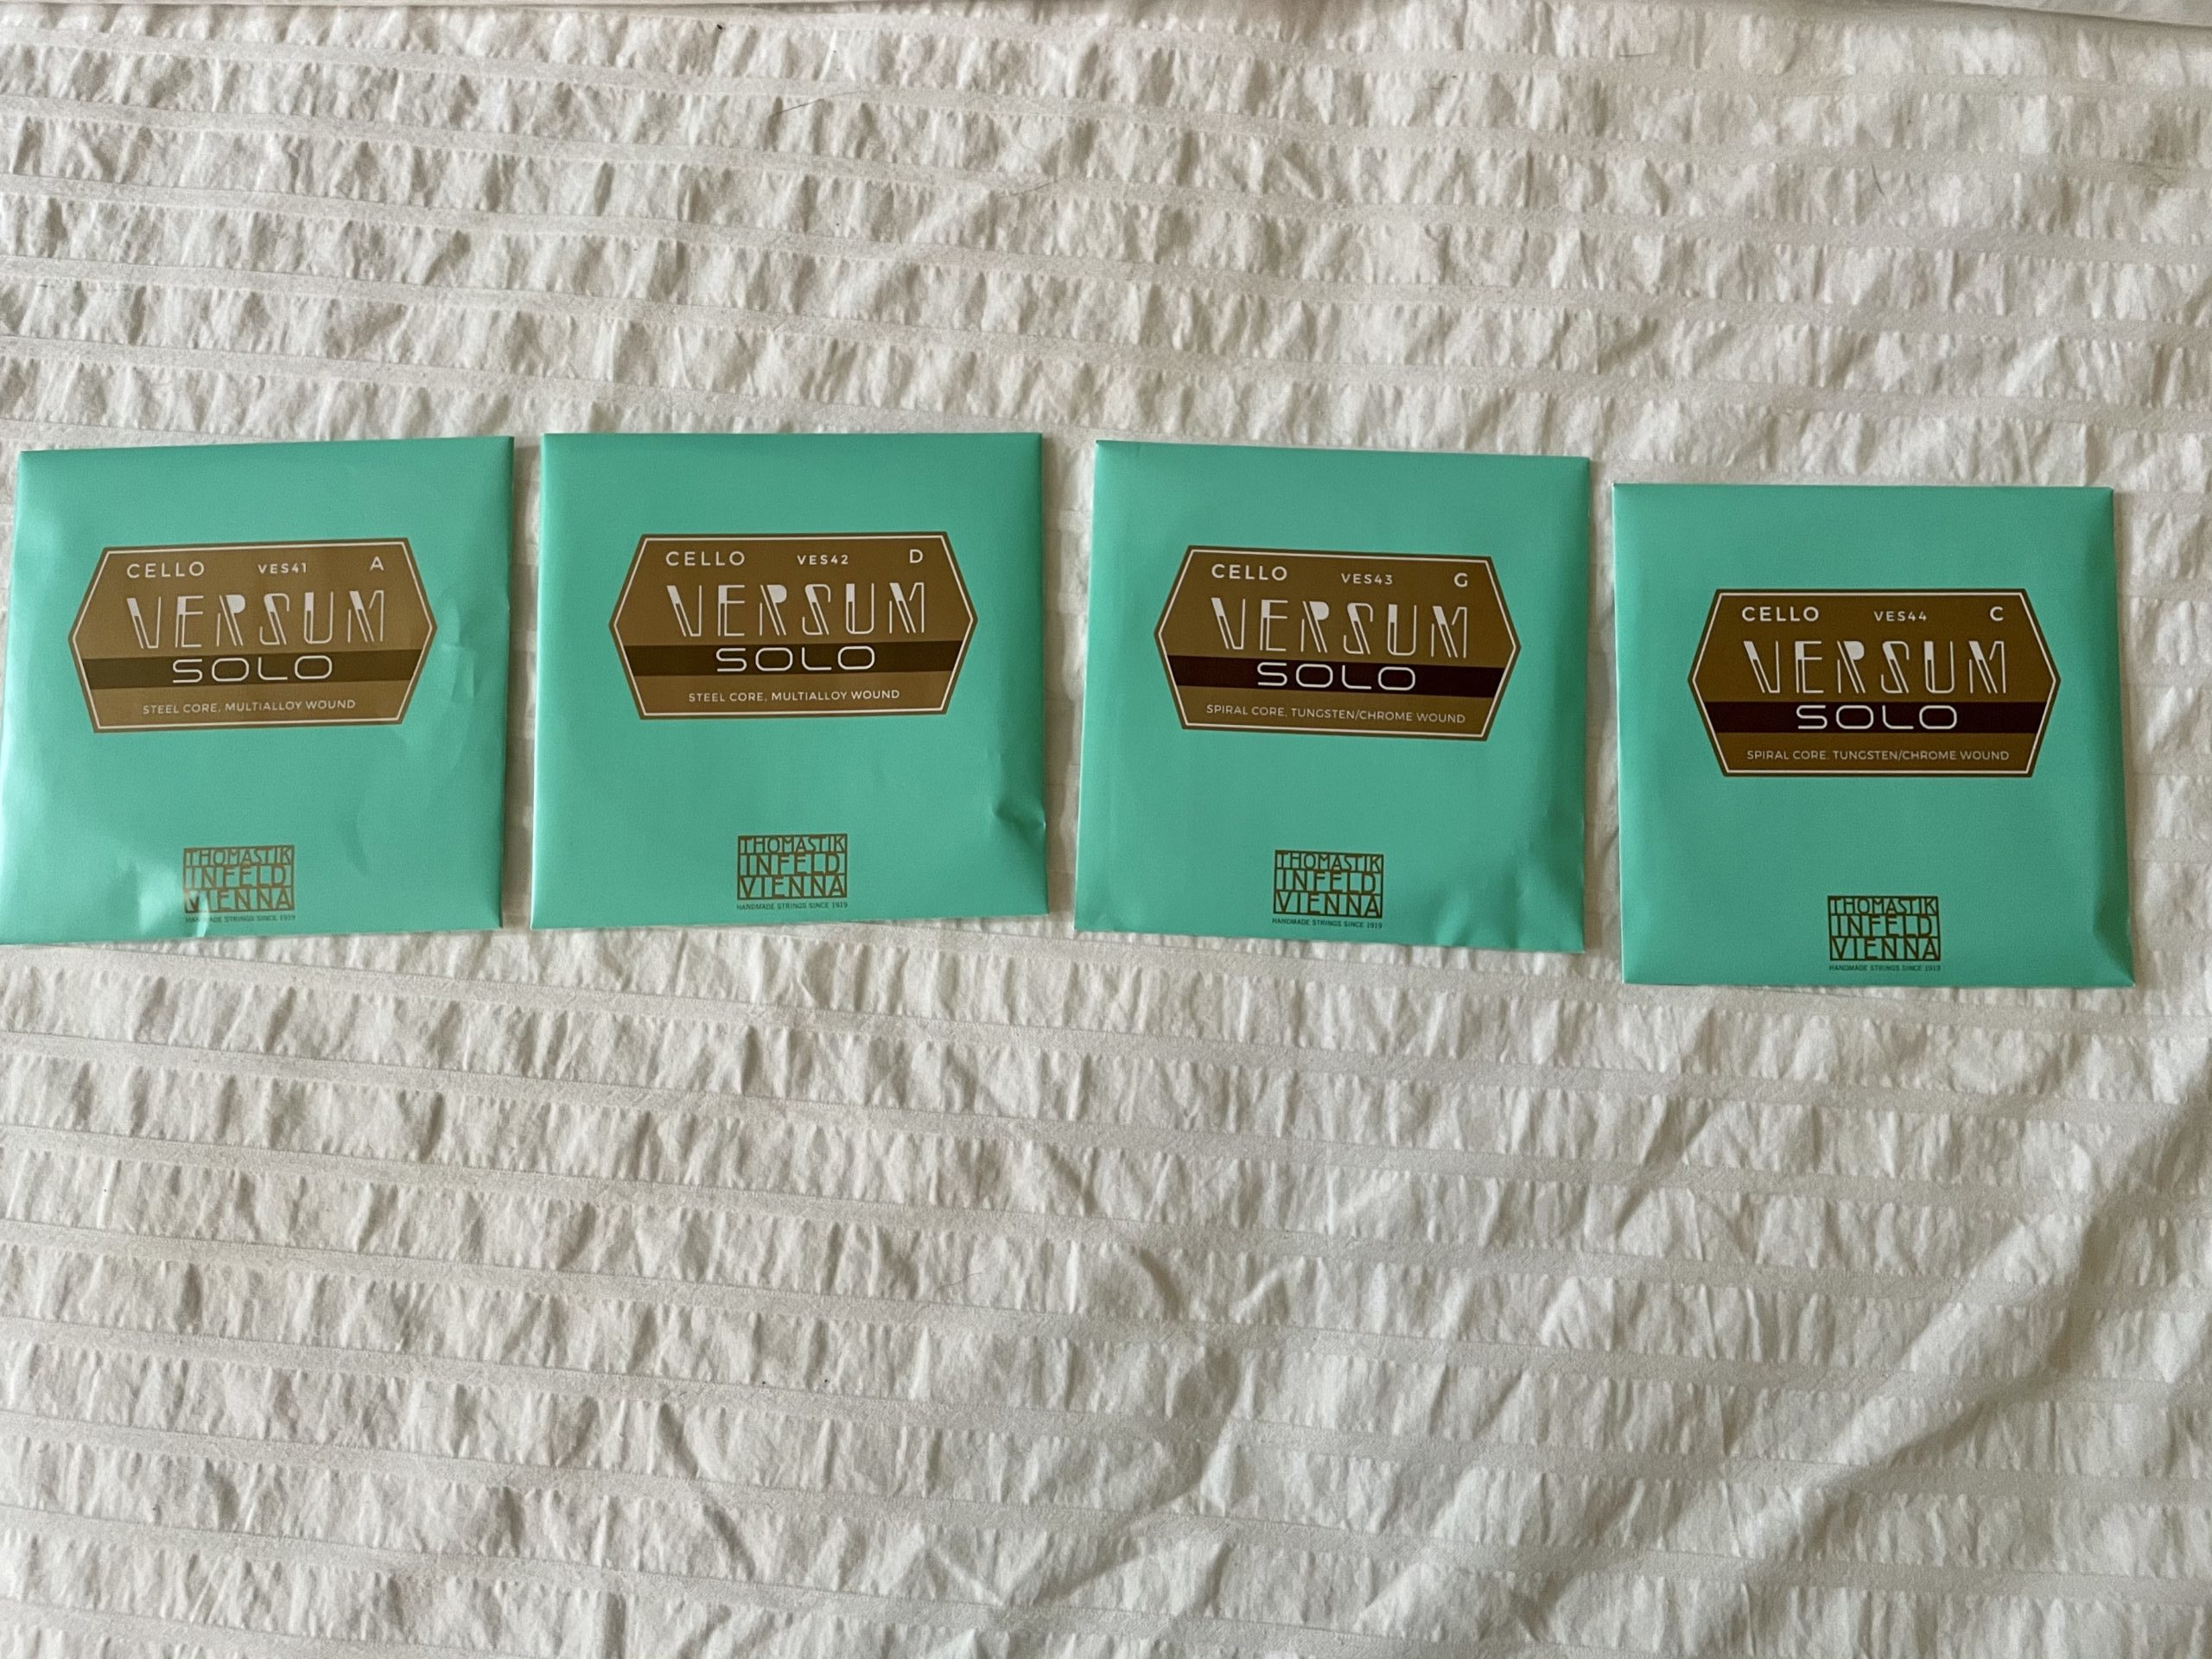 and place them in order from highest string to lowest.
Release tension on the A string first:
Now, (while seated) turn the cello -belly towards you- with the endpin still in the cello and the pegs just slightly above eye level. Find the A string and gently release the tension on the string. Once you have completely released all the tension from the string, gently pull the end of the string out of the peg and then remove the other end of the string from the A string fine tuner. Wind the string around your hand and tuck the end in to keep it from unravelling.
Keep this string as a spare.
Remove the NEW A string from the packaging and put the OLD string in that same packaging. Immediately mark the outside of that package “OLD”. That will be your spare A string if you should break one.
Grab that pencil (make sure it has a nice, sharp point) and run the led through the A string groove at the nut and on the A string groove on the bridge. The graphite will help the string move seamlessly through those two locations.
Attaching the cello strings:
Hook the little round ball of the new A string into the fine tuner mechanism for the A string. 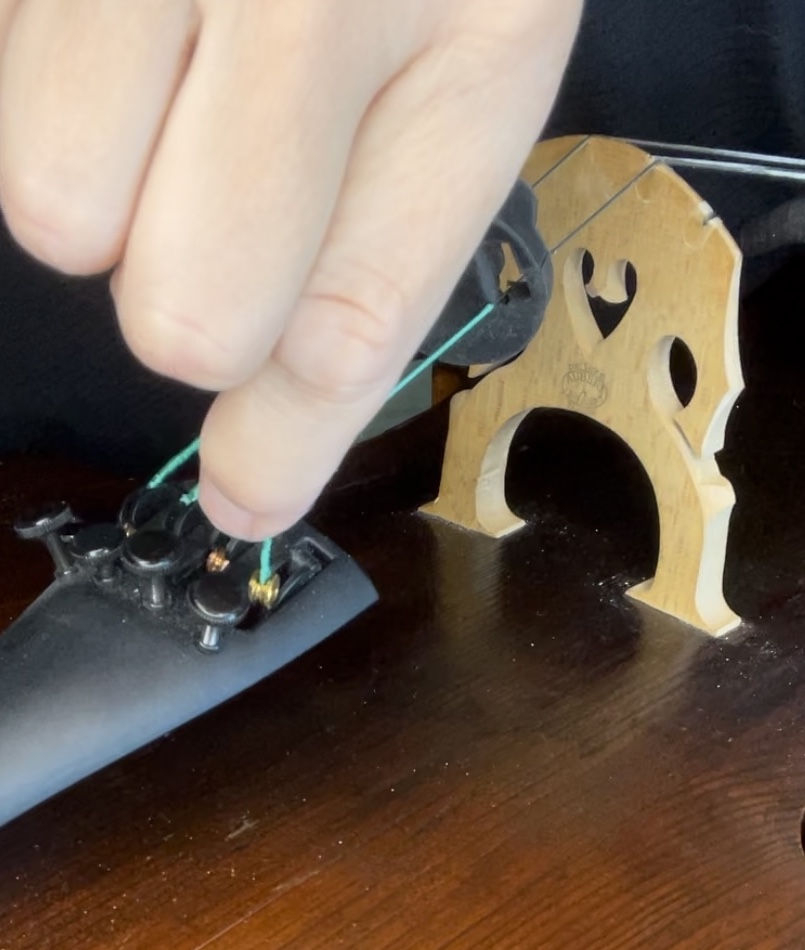 Bring the string over the bridge. Using your leg, or knee, try to gently hold the string in place on the bridge while you thread the other end of the string into the hole in the peg.
Pull the A string peg out just slightly so you can see the hole. Push the end of the string so it goes all the way through the peg but doesn’t touch the back of the pegbox. 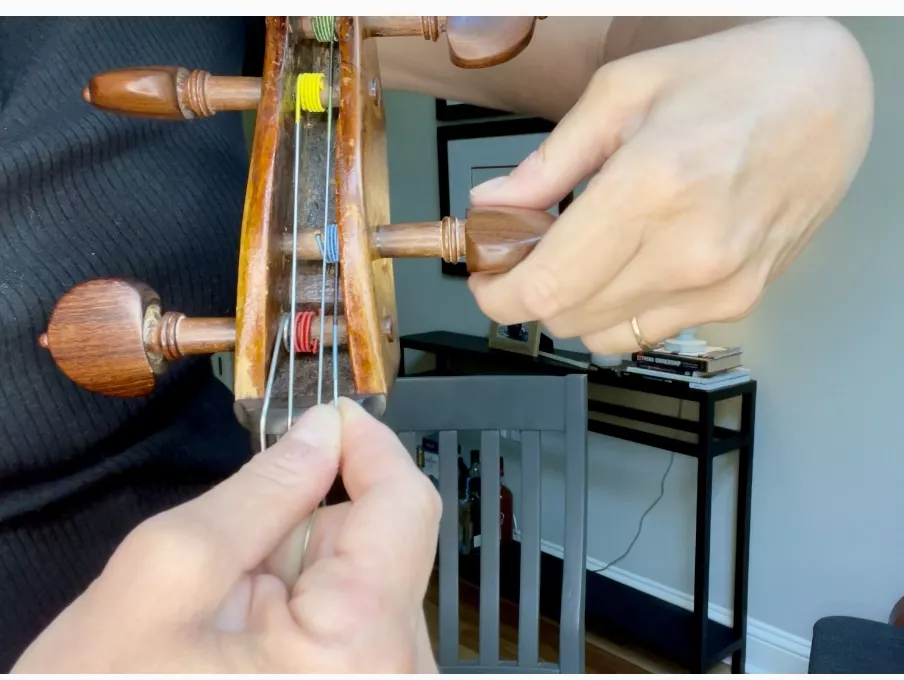
Now SLOWLYwind the string away from you making sure the string is winding in TOWARDS the side of the pegbox. Once it is in place, the string should be right up against the side of the pegbox. Double-check to be sure the string is still resting correctly in the groove in the bridge.
Bring the cello strings to the correct pitch.
Continue to slowly wind the string until it starts to feel tight. You don’t need to bring it all the way to the A 440 yet, just get it close (this is where having your tuner close by will help). When you turn the peg be CERTAIN to push the peg IN towards the peg box at the same time you are tightening it.
Attaching the remaining cello strings:
On to the remaining strings! Repeat steps 2-9 with the rest of the strings – one string at a time.NEVER take all the strings off at one time because your bridge will fall – and so will the soundpost.
Once all the strings are in place and partially tightened, go back to the A string and SLOWLY turn the peg until it reaches an A 440. Then tune the remaining strings to the correct pitch. You will probably need one more round of tuning after this is step is completed.
Clean the new strings:
Thoroughly wipe all the strings with a clean rag. Get rid of all the nasty gunk on there. Better for it to be on the rag than on your fingers.
Make sure to wipe the rosin off the strings after each time you play the cello.
The sound of new cello strings:
Strings take several days to settle into place and hold their pitch. You will need to continue to do some fine tuning of the strings while they are settling into their proper tension. But you should hear a substantial improvement right away in the sound of your cello, the clarity of the “bite” and the ease of projection. A new set of strings is well worth the trouble & expense!
The lifespan of new cello strings:
As an amateur player you can easily go 6-9 months without changing strings. But if you reach the professional level, you will likely change strings every 4-5 months.
Happy practicing from your friends at Cello Discovery – The Affordable, Expert Online Cello Course for Adult Beginners.